My Scrapbook Room

My Scrapbook Room
Creativity Unleashed Here!

Monday, October 29, 2012

Tree Decorations--Homemade style!

Our assignment this week, in preparation for our Holiday open house that is fast approaching, is to make some decorations for a tree that will be going up.  I guess it's never to early to make decorations, but I really had to get some done for my Kids class first!  It had always been my intentions to have the kids make some decorations also, so it was just a matter of getting those done and then I could get down to business.
For the kids class, I was going to make 4 ornaments and have them put together a little box to hold them. However, after deciding it takes longer than I at first thought to "whip" these decorations out, we are now making 3 and a box.  This is only an hour class! 
 
This little guy is quite easy, and with some buttons and a little ice stickles he looks quite cute. 

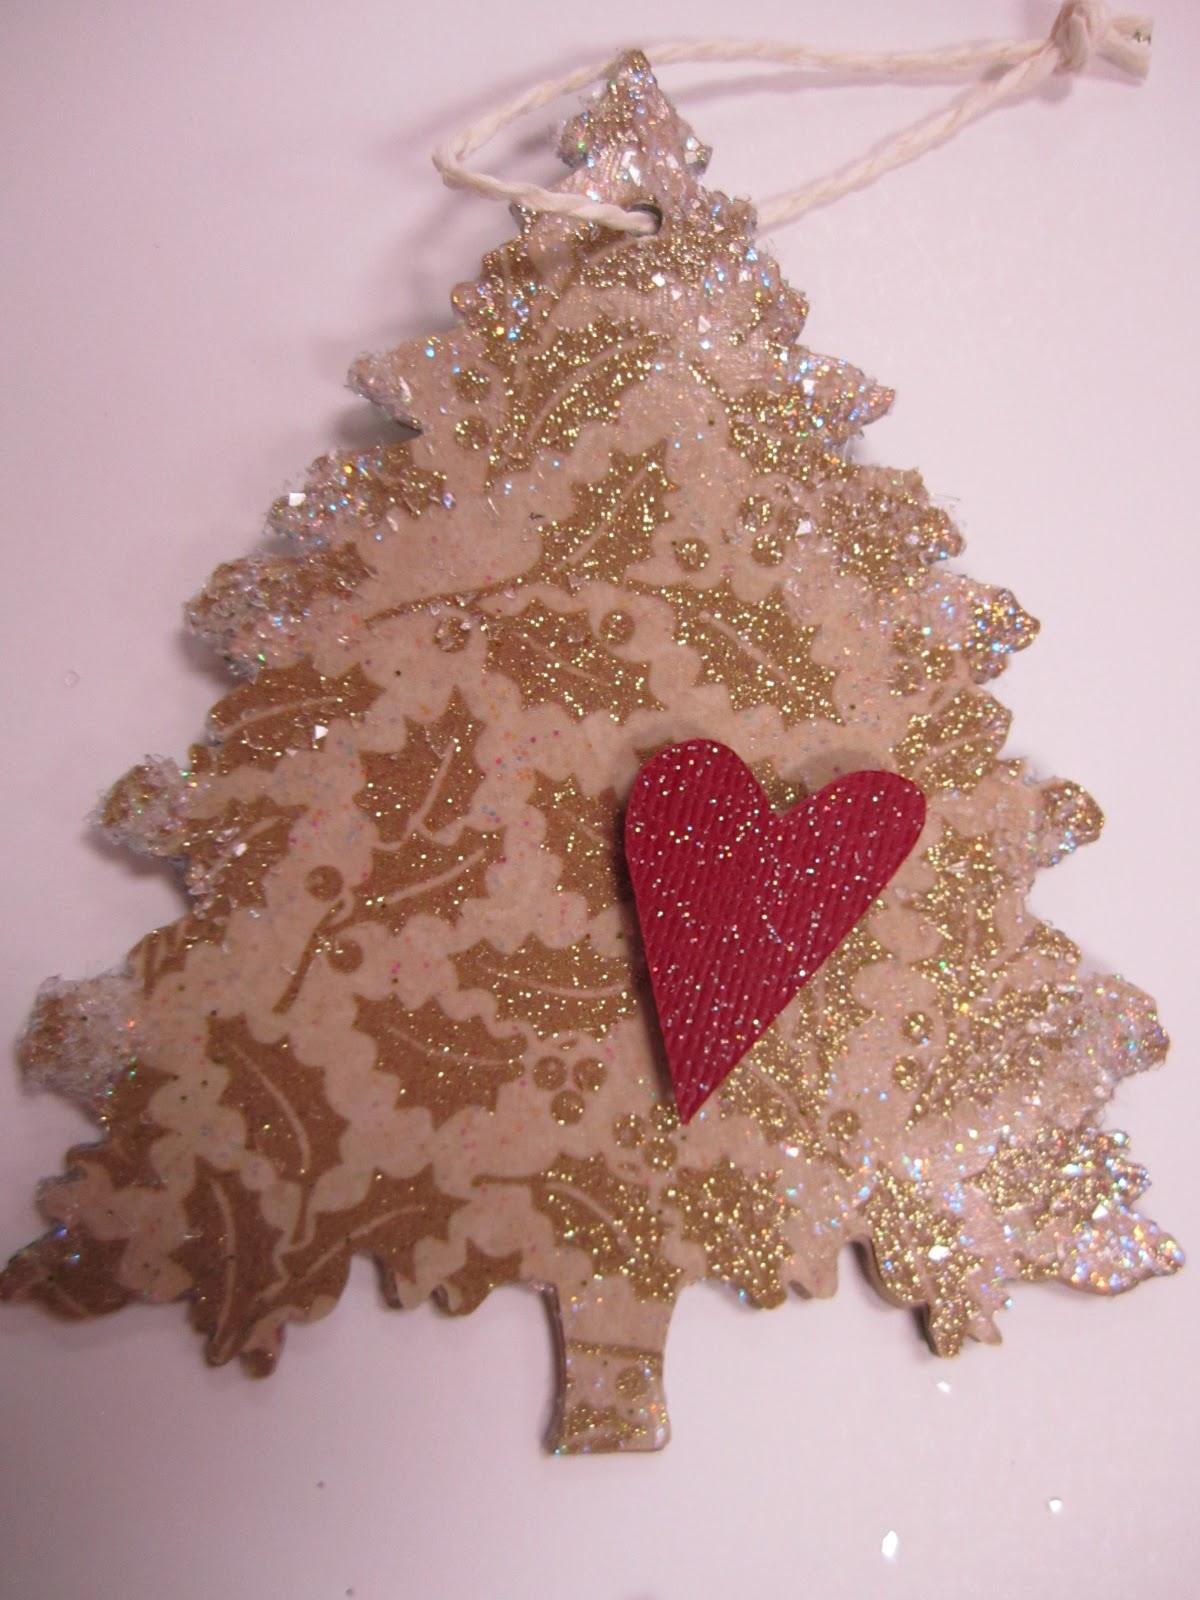
This tree was really fun to make, It is a sizzix cut, chipboard covered with pretty paper, the covered with glittered modge-podge.  I then dipped the edges in modge-podge and then into diamond dust.  Added a little pop out heart and this turned into a really pretty decoration.  I made more for the MB tree that are shown below.
Spools are a Big item right now and we just got quite an assortment of them in.  They can be wrapped with ribbons, washi tapes, tinsils, papers and then embellished anyway you want.


This is the first assortment of "creatures" I made.  All of these use sizzix dies, except the scalloped circle behind the deer which is a punch.
These are some more of the trees--much prettier in "person" than in the pictures 
and this is a star that was a fleeting thought for the kids class---that was until I started glittering it!  This is NO Kids project!  I still have glitter from one end of my room to the other!  What a MESS!  No matter what they say, glittering styrofoam is NOT that easy!
Above is a close-up of another tree. and below is my collection of snowmen (with a wreath thrown in )  These little guys are all sizzix, too (except the ones like the kids are making). 
They just make me smile, because they have such happy little faces.  A little inking, a hat for some, scarves, buttons, snowflakes--all add to their cuteness, I think.

 These two little guys look like they just want to play with you!
 The tree should be a very happy tree with all these little smiles on it. 

But I'm not the only one creating for this tree, several of the other girls have made some amazing decorations for it.   I can't wait to see it all decorated--I think I want a tree just like it in my house this year!   Certainly will be one of the prettiest around!
So, I leave you with one last smile!   Here's hoping everyone in storm Sandys path including my son Troy (who was pulled to NY to await the storm as a High lineman and his co-workers who will probably have a very complex and dangerous job ahead of them) stay safe and sound!  May the guys return home quickly!    Goodnight all!

Saturday, October 27, 2012

October Afternoon, here we come!

Yesterday, on a cool, but nice October Day  My friends, Janis and Betsy and I set out for Apple Valley, Minnesota to visit October Afternoon!    Well, actually, we visited October Afternoon in the morning---  October Afternoon is one of our favorite paper lines in scrapbooking and they were having one of their HUGE sales!  So off we went on a day trip---one of the funnest day trips I have ever been on--Good friends, Good food, Good shopping, Good Everything!

For lunch, we went to the Noodle Co., where Janis treated us to a delicious lunch!  We had already been to the warehouse and bought TONS of October Afternoon Stuff!  The day was young yet, so we came up with some other places to visitl  This is Janis and her Arizona Green tea---Gee, Janis, how many bottles/cans of that did you drink yeaterday??????

Here I am at our lunch stop!
And Betsy and Janis posed for one last picture there!


From lunch we went to the Barnes and Noble store that was close by.  After picking up a few of our favorite magazines (like any of us needed more magazines), we were off to the Mall of America!
Down the road and through a boatload of serious construction, we arrived at the mall.   Janis had never been before, so we got some pictures to prove she was there

A Starbucks later, we were on the road again.
and headed to a SB store that was going out of Business.  We had an added tour to the city when our GBS person "Frannie" (we named her that), lead us straight to the airport terminals, before she figured out we did not want to "fly" to the SB store, we wanted to "Drive"!  Silly, Silly, Frannie!
 When we were finished, we had a car full of great finds--so we headed back to IOWA--just don't understand why these days are so much shorter than your average day!  We made a great traveling team and have vowed to do this again!
Thanks Janis and Betsy for a very fun day---Even though, I now have to find room for so much more stuff in this already, bulging at the seams, Scrapbooking Room!


Sunday, October 21, 2012

The LAST Countdown, I Hope!

Ok, I think I am finally DONE making countdown calendars--and you can bet when December gets here and Christmas is upon us, I will still say "Where did the month go?" !!!  The calendar below, I think is one of my favorite.  I found one like it on a blog, or scrapbook site somewhere (sorry, I have forgotten where, so I can't give credit where it is due)--could have been a pinterest thing too.  At any rate, the base is a 24 slot mini muffin tin.  I made 24 paper squares--a 2-3/8" square of Cardstock with a 2-1/2" piece of pretty paper on top of it.  Then I added a number from 1-24 on each square and a
3-D embellishment of some type to each one.  I added 2 slim strips of magnet tape to the top and bottom of each square on the back and then randomly put the squares over each hole.  (For this one I mixed the numbers up, so they are not in a standard row.  I added a bow and ribbon-------
and  then you put a tiny treat in each tin under the squares.  This would be good for single small pieces of candy, those little party rings, etc. 
 
The next calendar, I am just finishing up, is made of 25 little bitsy sacks.  The one I used as my inspiration used preprinted little sacks that had white dots and chevorons printed on them.  But I decided to be different and do my own thing.  So I ran them all through my little embosser purse, using some of my Christmas themed embossing folders--christmas trees, snow flakes, little socks, holly leaves and some swirls.  After embosssing, I went over the tops of the embosssing with a white ink pad to bring out the embossing.  ----
Since I wanted to keep everything in neutral and whites, I went through all my embellishments and dug out all the white Christmas stuff I could find. 
 
The only thing of "color" is the red in the numbers and the red twine the sacks  are hanging on.  I also cut out many of the embellishments with punches and my sizzix dies. 
I stamped some Christmas sentiments on little wooden banners (see #7 above) and added those to a few of the little sacks. 
I then "hung" them on the red/white twine with little clothespins--actually, I stapled them on first for added security. 

The next (and last)  thing I will do is intertwine the twine onto an evergreen garland.  This really looks cute on a fireplace mantel or down a staircase rail.

,
It really didn't take that long to complete, but I did add a lot of stickles to the embossed designs for a little added enchantment and sparkle, because you know me, I can't finish anything without some sort of shine or sparkle or glitter! 
So now we are ready for a countdown Holiday weekend the first weekend in Nov. at Memory Bound---Oh, did I mention, I made the sign below  for the open house!

 
and in my spare time one day at work, I covered this cute little star box to display, also.  We sell these in various sizes and shapes and they are so much fun to play with and decorate.  
So as I countdown for the last time (until December is really here)  Here's hoping I have given you some ideas for an ever so popular countdown calendar to make for your holidays.  and remember they aren't just for Christmas--we are now seeing them for all kinds of occasions--birthdays, weddings,  other holidays--so many possibilities!  Have a great week and happy Scrapbooking!
 

Wednesday, October 17, 2012

Those Countdown Calendars just keep happening

Well, I got 2 more of my "countdown" projects all wrapped up--for real!  This is the "1000 yards of ribbon" wreath---not really 1000--closer to 500--either way it was a humungous amount of ribbon, fabric,and netting and hours of tying.  But covered in glitter (from all the glittered netting), I managed to finish it up yesterday.  If you look closely, you will see little circles with numbers  in them--that's the little paper covered candy bars with the "countdown" numbers on them.  Easily snipped out each day for a little treat without destroying the whole wreath
and my 16 x 20 picture frame with the little socks is now finished.  The little clothes lines are in and the stockings are hung with little clothespins in red and green.  There are little activities on the back of each for parents and kids to do together.  I know in this day and age, "family" time seems to be scarce, but I love the idea, in the busiest month of the year, we take time to slow down and just have fun as a family.  Something tells me this will be remembered far longer, than all the husltle bustle in the world!
I now have a --yup, you guessed it --"countdown" sign to get done and I have 2 more countdown ideas to work out ---if I can in the next week!    Now I have plenty of countdown calendars for all the kids and no kids to use them!  Still think they will make cute decorations!  We'll see.  Oh, and my countdown calendar (the Santa face where you add pom poms to his beard  --see my Oct. 10th post), is now on sale in easy to put together kits at Memory Bound---so any kid can have fun counting down!

Monday, October 15, 2012

I Can count to 24---------

-----Forward and BACKWARDS!  Yes, I've been making "Advent" or Christmas "Countdown" Calendars for our holiday display at Memory Bound!  The first one below is actually a "12 days of Christmas" countdown.  This one is made on an old cookie sheet--spray painted red.  I cut some pretty papers for the backgrounds and used 1/8" artist tape to divided it off into 12 spaces. I cut 12 little 3" gingerbread men from my cricut and embellished them with snow writers and stickles.  Cut numbers from the cricut and put on their bellies,  cut a title out (actually printed the "I can't wait" on the computer).  Had my Hubby drill 2 holes in the top side to string a pretty ribbon through, and added a couple of little gingerbread ornaments.
Now it wouldn't be a total countdown without those little "surprises" hidden somewhere.  Well, on this countdown, the little guys have a magnet on their backs and are removable.  and behind each one is a surprise activity.  This one says go buy  a toy for the Toys for Tots.  Most of them on this board are for parents to do with their kids--family ideas.  I think this would be very cute hung in the kitchen.
The second one I completed today (all of these were started and in various stages of completion before today),  was one made from the new American Craft pocket tags with the numbers 1-25 already on them.  I covered a foam board in a clear wrap with tiny holly on it.  Then I inked all the tags in a red, a green and a brown ink and added a group of embellishments to the top of each one.  The pocket is the lower half.
Here are a few up closer.  I hooked them on the board with tiny little plastic hooks, glued on .  I also removed the original strings from the tags and put on a little wire brad. 
The little pockets are big enough to tuck a little surprise into.
This is the title on this countdown calendar.
This is a stack of boxes and a 12 days of Christmas.  I think I have posted this, but I finally found a pedastal box for it. 
Close up of the tags on the boxes.
and the last one is still a work in progess, but I Love this one.  The inspiration was on a blog I follow.  Of course, I did not have a frame near big enough, so on a search I went.  Didn't have to go too far--Hobby Lobby--I was looking for a frame (no glass, no back, just frame) figuring I would have to buy some limey green paint to paint it.  Was walking around the store when Whamo--there it was-- a 16 x 20 some frame in Limey green!  and did I say I Love it!  It was on sale too--so that cinched the deal--no paint to buy, no painting to do, perfect color.  The inspiration piece had little red tags,  I decided on the little red socks with green tops.  The Merry and Bight on the bottom is done in vinyl.  When it's finished, it will have little jut "clothes lines" run from edge to edge and the little socks will be hung with little clothes pins  to them.  Each little sock has the "surprise" on the back of it.  Things like "lets pop some pop corn and watch a Christmas Movie"--again things families can do together that are really fun.
When I get it all done, I will post a finished picture.  I still have the wreath with the 1000 yards of ribbon to finish (I'm pretty sure it's a 1000 yards--sure seems like it when I'm cutting and tying!)
At any rate, I'm calling it a day--I made great progress today, will go to the store and finish up some more tomorrow.   25, 24, 23, 22, 21-----------------------Good Night!

Wednesday, October 10, 2012

Lots of Creative Activity in this Scrapbook Room Lately!

I can't believe it's Wednesday already!  But I guess I've been so buried in my room (I should have posted a  picture of THAT!) that I didn't realize I hadn't posted since Sunday.  My room is a DISASTER, but I have gotten a lot done.    You know how I said on Sunday I couldn't wait to do Aly's Color Run LOs ---well got them done and I really sort of like them.
I used paint dabbers to flick paint of all colors around the edges of the pages.  I left the white rim on all the pictures (I usually cut this off) and matted them all with black.  The die cut I got at MB was in black and white, so it went well with all the colors on the page.
I then punched out little circles in all the coors to sprinkle on the pages and other circles out of a paper I had that look like star bursts in different colors.
I ended up doing 4 pages since Aly had such great pictures.
and I added a slogan and a saying.  Since it was dubbed the "happiest Run in Town", I added that and I had a stamp that I love that says "Life is about using the whole box of crayons"  Seemed to fit perfectly in many ways.
 
Last week, actually, I also finished up several other LOs.  The next two are based on little stories Todd and Aly put on FB about the cute things the boys do or say.  This one is Aiden's .
and this one is about Nicholas's ordeal with the toothfairy!  They are the stories you just don't want to forget!
These were some pics that they had taken last Spring (when the snow was still on the ground).  I just thought they needed to be on a LO.  They're terrific pictures.
and this one is of Todd's award for  1st place in the State Sniper School.  So proud of him!
This week, I have been concentrating  on Countdown (or Advent) calendars.  We are going to have a whole display of them at the MB Holiday open house, so I have been trying to come up with some unique ones to display. Most of these I found on the internet (well, the idea anyway--I certainly never do them exactly like I find them).   This one is made of ribbons with little pockets (for the treats) down them.  Seemed like a simple enough idea, but looks are deceiving for sure!  I used a dowel (I think their's was on a hanger), and wrapped it with washy tape.  The ribbons are wrapped on this and hang down for the pockets.
I cut the little pockets 2-1/2" x 5" , folded them and sealed the edges with various washy tapes, then attached them to the ribbons with tacky tape.  Just try and get all those pockets lined up correctly! Each pocket has a number on it counting down to Christmas day (a slightly bigger pocket) I added a ribbon and some bells to the top to hang it by--one calendar DONE!
The second one above if a cute Santa face--great for the little ones.  I cut him out of a cricut design--Dress up paper dolls--and glued him to a Chipboard backed Cardstock.  We made a set of little 1" circles with numbers in them (thanks Kellie for whipping those out for me!),  I filled the beard with numbers--now the idea is to add a pom pom each day to the circles until the last one is added on Christmas day and Santa has his full beard.  I added a ribbon for hanging and #2 is Done!
The third one I have finished is a wood block one--made of 4 wood blocks, it is stacked in the form of a Christmas tree.  They are spray painted, have torn, inked papers added to the fronts,  words added, everything modge podged, a little snow writer added to the edges and stars on the top to count the days down.  Since it is stacked 4 high, I did glue the blocks together, for safety reasons, mostly.
I am working on 3 or 4 other countdown items.  A wreath, a cookie sheet, a tag one (uses American craft pocket tags), and another block one using chalkboard papers.  We'll see what creations come of each one of them----Countdowns are really a big item right now---count down to birthdays, weddings, special occasions--think I'll try a couple of those, too--after the holidays.